Replacing or installing new windows is one of the most impactful upgrades you can make to your home. Not only do windows influence curb appeal, but they also play a critical role in energy efficiency, security, and comfort. Whether you’re tackling a DIY project or hiring a professional installer, understanding the window installation process ensures a smoother experience and a better result.
This guide breaks down everything you need to know about window installation, from preparation to completion, so you can feel confident about your next big project.
Why Proper Window Installation Matters
Windows do more than keep out rain and wind; they can significantly influence your home’s energy bills, resale value, and overall ambiance. Improperly installed windows often result in drafts, leaks, and higher heating or cooling costs. Additionally, a poorly aligned window may compromise both the structural integrity of your wall and the functionality of the window itself (think jammed sashes or swollen frames).
By ensuring the installation is done right, you’ll maximize energy efficiency, maintain a stable indoor climate, and enhance the overall lifespan of your windows.
Step 1. Preparing for Window Installation
Before grabbing tools (or hiring someone who will do the hard work for you), preparation is key. The following steps will set you up for success.
Choose the Right Windows
Not all windows are created equal. You’ll want to select a style that complements your home’s architecture while meeting your specific needs. Here’s a quick breakdown of popular window types:
- Double-hung windows: Classic and easy to operate, ideal for traditional homes.
- Casement windows: Hinged on the side and open outward; excellent for airflow.
- Bay or bow windows: Add character and create a cozy nook, perfect for living rooms or kitchens.
- Sliding windows: Practical and low maintenance, great for modern aesthetics.
- Awning windows: Top-hinged and open outward, perfect for rainy climates as they allow ventilation without letting water in.
Other considerations include window material (vinyl, wood, aluminum, fiberglass), energy efficiency ratings, and glazing options such as double- or triple-pane glass.
Gather Necessary Tools
If you’re taking the DIY route, ensure you have the right equipment on hand. Here’s a handy checklist of essential tools:
- Tape measure
- Level
- Caulking gun
- Utility knife
- Safety gloves
- Hammer and nails or screws
- Pry bar
- Insulation foam
Prepare the Space
Clear the area around the window both inside and out. Remove curtains, blinds, or furniture to avoid obstruction, and if necessary, use drop cloths to protect floors from dust or debris during installation.
Step 2. The Installation Process
The installation process involves precision and timing. Whether you’re installing a brand-new window or replacing an old one, follow these general steps for a seamless fit.
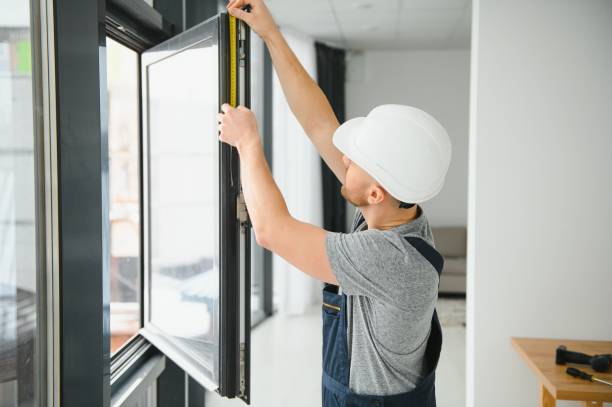
Measuring for a Perfect Fit
Accurate measurements are a non-negotiable part of window installation. Measure both the width and height of the opening in three different places (top, middle, and bottom). Use the smallest measurement to ensure the window fits snugly into the opening.
Removing the Old Window (for Replacements)
If replacing an existing window:
- Safely remove any storm windows or screens.
- Use a pry bar to gently loosen and remove the interior stops and sashes.
- Be cautious when removing glass panes to avoid injury from sharp edges.
- Inspect the opening for signs of mold, rot, or damage. Repair the area as needed before proceeding.
Fitting and Leveling the Window
New window frames or replacements should sit snugly within the opening. Test fit the window to check for alignment, and use a level to confirm the installation is even. Shim the window as necessary to adjust the fit.
Securing the Window
Once you’re happy with the positioning, secure the window in place with nails or screws. Most windows include mounting instructions from the manufacturer that specify the best fastening methods for their products.
Insulating and Sealing
Air leaks can quickly undermine your hard work and negate energy efficiency benefits. Be sure to install insulation properly around the edges of the window. Use expanding foam sparingly to avoid buckling the frame. Then, apply watertight caulking along the exterior edges of the window to block moisture and drafts.
Step 3. After Installation Care
A newly installed window needs a little TLC to ensure it performs optimally over time.
Cleaning the Window
Wipe away fingerprints, dust, or smudges left behind during installation. Use a non-abrasive cleaner to avoid scratching the glass or damaging any coated finishes.
Inspect for Any Gaps or Leaks
Check your work for small gaps along the edges. Run your hand around the edges of the window to feel for air leaks. If you find any, reseal with additional caulking.
Test the Window’s Operation
Open and close the window several times to ensure it moves smoothly. If it sticks or seems off-balance, you may need to make minor adjustments to the alignment.
Professional vs. DIY Installation
While DIY installation is cost-effective and rewarding, it’s not always the best option for everyone. If your windows are oversized, uniquely shaped, or located at great height (e.g., an upper story), it may be safer and more efficient to hire a professional installer.
Additionally, poorly installed windows can void warranties or lead to higher repair costs down the line. Professional window installers bring specialized expertise and tools your average DIYer might not have access to.
Benefits of Professional Window Installation
- Saves time and effort for homeowners.
- Ensures perfect alignment, insulation, and aesthetic appeal.
- Comes with service warranties that protect against future defects.
The Bottom Line
At the end of the day, the effort you put into window installation (whether DIY or through a professional) will affect performance for years to come. With the right preparation, careful installation, and thoughtful aftercare, you’ll enjoy a light-filled, energy-efficient home that’s protected from the elements.
If this guide helped you better understand the window installation process, consider sharing it with a friend or neighbor who might be planning their own project!