Screen recording on a MacBook is a useful feature for creating tutorials, capturing gameplay, recording meetings, and more. You can just hit a few buttons and start recording your screen to share funny or informative videos with your friends, family, or colleagues.
In this guide, we will explore everything you need to know about screen recording on a Mac. Whether you need to capture video and internal audio for a presentation or take a short clip to post on X (formerly Twitter), the Mac ecosystem provides you with a range of native tools and third-party software options.
Let’s dive into how to record your screen on a Mac and make the most out of this feature.
Using Native Tools for Screen Recording on a MacBook
1. QuickTime Player
Every Mac user who worked a lot and long enough on a Mac knows about QuickTime Player. This stock app is more versatile than just a media player. Among other things, QuickTime Player is also great for converting media files, and, you guessed it, screen recording too.
All you need to do is:
- Open QuickTime Player from your Applications folder or press Command + Spacebar and type in “QuickTime”.
- On the menu bar, click on File > New Screen Recording or use a hotkey.
- Click on the record button (the red circle)
- To stop recording, click the Stop button in the menu bar, or press Control + Command + Esc.
Pros:
- Built-in and free: No need to download additional software.
- Simple and straightforward: Easy to use for basic screen recording.
- Basic editing tools: Allows simple trimming the beginning and end of video clips.
Cons:
- Limited features: Lacks advanced editing tools and features found in dedicated screen recording software.
- No annotation tools: You cannot add annotations or effects during or after recording.
2. Screenshot Toolbar
Starting with macOS Mojave, MacBooks come with a built-in tool that allows you to take screenshots and capture screen activity easily. The toolbar also includes multiple options to record your Mac screen.
To use the Screenshot Toolbar for screen recording, you’ll need to do mostly the same thing as with QuickTime Player but in a shorter way:
- Press Shift + Command + 5 to open the capture window.
- Move to the Options tab to choose your recording settings, like include a delay and turn on mouse clicks.
- Choose the type of recording you want from the toolbar: Capture the entire screen, Capture a portion of the screen, or Capture a window.
- Click Record to start. Stop when ready.
Pros:
- Intuitive Interface: In comparison with QuickTime, you don’t have to dig through menus and submenus.
- Various recording options: Offers multiple recording modes.
- Additional settings: Allows for a bit of customization for recording sessions.
Cons:
- Limited editing features: Same as QuickTime, lacks editing tools.
- No audio control: Users cannot adjust audio settings before or during recording.
4 Best Tools for Screen Recording on a MacBook
1. Movavi Screen Recorder
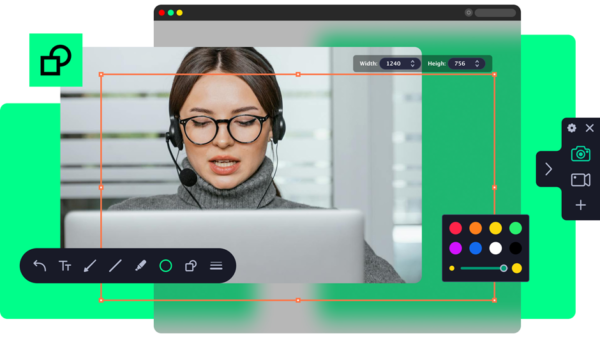
Looking for a simple way how to screen record on a Mac without sacrificing on additional features?With Movavi Screen Recorder, you can capture live streams, webinars, tutorials, Zoom calls, and other activities in high resolution.
With Movavi Screen Recorder, you have:
- Drawing tools: Users can draw on the screen or add arrows and shapes in real-time to highlight important points.
- Timed recording: Schedule recordings by setting date, time, and duration.
- Built-in video trimming: Cut recorded footage before saving or sharing online.
Cons:
- The free version only allows up to 5 minutes of recording and adds a watermark.
2. Zight
Zight (formerly known as CloudApp) is a popular Mac screen recording and sharing tool. It’s a cloud-based platform, so you can access your Mac recordings on anything from a browser to a mobile device.
Zight offers:
- Simple recording: You can record your entire screen, specific windows, or regions.
- Direct sharing options: After finishing the video, you can share it right away through email or social media platforms.
- Annotation tools: Allows adding text, drawings, and arrows in real-time during recording or after capturing footage.
Cons:
- The free version only allows 5-minute recordings
3. ShareX
If you ever wanted more granular control over your screen recording sessions, ShareX is worth checking out. It’s a powerful open-source screen recording software for Mac packed with features and high customizability.
Some of ShareX features include:
- Hotkeys for everything: You can assign hotkeys to start/pause/stop recordings, take screenshots, upload files online, or set custom workflows for anything else you can (or cannot) think of.
- GIF recording: The program provides a separate feature to capture animated GIFs from the screen.
- Unlimited recording time: No limitations on how long your recordings can be. You decide when it’s time to stop.
Cons:
- With over 16 years on the market, ShareX still sports an outdated interface.
4. ActivePresenter
ActivePresenter is a screen recorder with eLearning features. It’s perfect for professionals and educators who want to create interactive video tutorials, software demos, or presentations.
Features of ActivePresenter include:
- Interactive simulation: Users perform tasks on a screen and the program records the actions to create slides.
- Video enhancement: The editor allows adding effects, animations, and transitions to your video.
- Recording variety: It can record screen, voice, and webcam at the same time.
Cons:
- More geared towards creating eLearning content rather than traditional screen recording.
Conclusion
That’s practically everything you need to know about how to screen record on a Mac. Native tools are an excellent way for beginners to learn the basics of screen recording, but if you want more control and features, you can always opt for third-party software. Each tool comes with its own set of pros and cons, so choose one that best fits your needs and budget. Happy recording!