Managing multi warehouse WooCommerce inventory without conflicts means using tools or methods that keep stock accurate across all locations. It works by tracking product amounts for each warehouse, routing orders to the right place, and syncing updates in real time. These steps stop overselling, fix stock mismatches, and keep every warehouse working with clean and correct data.
This article explains how to manage multi warehouse WooCommerce inventory without conflicts, using clear steps and simple tools. It covers plugin based options, ERP systems, and custom routing methods so store owners can pick what fits their setup. You will see how each method prevents stock issues and supports smooth order flow. To easily learn the details, continue reading.
Why Does Multi Warehouse Inventory Get Messy in WooCommerce?
Multi-warehouse inventory gets messy in WooCommerce when expanding locations overwhelm normal tracking and coordination. Data complexity grows quickly when multiple sources fail to update consistently. Understanding core issues helps businesses prevent errors and maintain smoother operational control.
- Data Fragmentation Across Warehouses: Fragmented warehouse data becomes inconsistent when platforms lack unified syncing, essential for reliable operations. Confusing visibility disrupts fulfillment accuracy, causing frequent errors across multiple active locations.
- No Native Multi-Warehouse Support: WooCommerce lacks native multi-warehouse features, forcing reliance on plugins, which frequently cause operational instability. Plugin conflicts reduce efficiency and complicate scaling across distributed fulfillment hubs.
- Complex Order Routing Logic: Routing orders correctly requires intelligent rules that many default systems struggle to manage efficiently today. Inaccurate routing delays shipments and increases customer dissatisfaction across varied shipping zones.
- Manual Stock Adjustment Errors: Manual warehouse adjustments create frequent mistakes when automated processes are unavailable for accuracy. Incorrect counts trigger overselling problems, harming customer trust significantly.
- Inaccurate Reporting Insights: Scattered warehouse data limits reporting accuracy, reducing valuable analytics required for optimization. Poor insights weaken forecasting reliability, impacting business decision-making heavily.
- Slow System Synchronization: Sync delays produce outdated stock values, disrupting workflows requiring precise real-time availability. Inconsistent updates create confusion, reducing operational stability during peak demand periods.
How to Manage Multi Warehouse WooCommerce Inventory Without Conflicts? (Top 3 Methods)
Managing multiple warehouses in WooCommerce can become challenging when you need accurate stock tracking, proper warehouse routing, and conflict-free fulfillment. Below are the three most reliable and scalable methods to manage multi-warehouse inventory without overselling or stock mismatches.
Method 1: Using Inventory Management Plugin
There are many helpful plugins available to manage multi-warehouse inventory in WooCommerce, and in this guide, we use the Multi Location Inventory Management for WooCommerce as an example to demonstrate how easily multi-warehouse stock can be handled. Follow this entire process of managing Multi Warehouse WooCommerce Inventory with the plugin:
Step 1. Install the Multi Location Inventory Plugin
To start managing warehouse-based inventory, you first need to install the plugin.
Option 1: Install from the WordPress Dashboard
- Log in to your WordPress admin panel.
- Go to Plugins → Add Plugin.
- Search for Multi Location Product & Inventory Management for WooCommerce.
- Click Install Now.
- Click Activate.
Option 2: Install Manually
- Download the plugin ZIP file from the WordPress plugin directory.
- Go to Plugins → Add Plugin → Upload Plugin.
- Upload the ZIP file.
- Click Install Now, then Activate.
If you are using the Pro version, activate the license to unlock premium features.
Steps:
- Go to Location Manage → Settings → Plugin License
- Paste your license key
- Click Activate
This enables advanced warehouse management features.
Step 2. Create Your Warehouse Locations
After activating the plugin, the next step is to create the warehouse locations inside WooCommerce.
Ways to create locations:
- Go to Location Manage → Locations.
- Click Add New Location.
- Enter the warehouse details:
- Location name
- Description
- Address
- Click Save.
Repeat the process for every warehouse you operate.
Key benefit: Each warehouse will maintain its own stock quantity, pricing structure, and product availability, helping WooCommerce handle multi-location inventory without conflicts.
Step 3. Assign Products to Each Warehouse
Once locations are created, assign products to the correct warehouses.
Ways:
- Go to Products → All Products.
- Select a product and click Edit.
- On the right side under the Location section, select the warehouses where the product is available.
Next, configure the inventory:
- Scroll to Product Data → Inventory.
- Enable Track stock quantity.
- Enter the total product quantity.
Then configure location-specific inventory:
- Open the Location Settings tab.
- Enter for each warehouse:
- Stock quantity
- Regular price
- Sale price
- Backorder status
- Click Update to save changes.
This ensures each warehouse maintains independent inventory levels, preventing stock overlap or misallocation.
Step 4. Add a Location Selector for Customers
For an accurate warehouse inventory display, customers should select their location while browsing the store. This allows WooCommerce to show stock availability based on the selected warehouse.
Method 1: Add Through Widgets
- Go to Appearance → Widgets.
- Select the Header Widget Area.
- Add a Shortcode block.
- Paste the shortcode:
[[mulopimfwc_store_location_selector title=”Select Your Location”]]
(Remove extra brackets before saving.)
- Save the widget.
Method 2: Add Through the WordPress Customizer
- Open your Shop Page.
- Click Customize.
- Go to the Header section.
- Add a widget and insert the same shortcode.
- Save your changes.
Now customers will see a location selector dropdown, allowing them to view inventory from the nearest warehouse.
Step 5. Display Warehouse-Based Stock on Product Pages
You can also show warehouse-specific stock information directly on product pages.
Procedure:
- Go to Location Manage → Settings → General.
- Locate Location Display Format.
- Choose how you want the warehouse stock to appear.
After saving the settings, each product page will display location-wise stock availability, helping customers understand which warehouse has the product in stock.
Step 6. Add Warehouse Managers
For stores with multiple warehouses or teams, assigning managers improves operational efficiency.
Procedures:
- Go to Location Manage → Location Managers.
- Click Add New Location Manager.
- Enter manager details:
- Name
- Assigned warehouse
- Set permissions based on responsibilities.
- Save the manager profile.
Next:
- Go to Users → All Users.
- Set a password for the new manager.
- Share the login credentials with them.
Each manager can now manage inventory for their assigned warehouse independently.
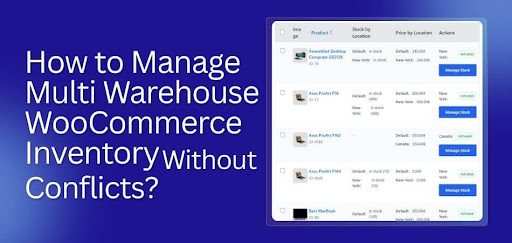
Step 7. Monitor Inventory Using the Dashboard
The plugin provides a centralized dashboard to track inventory across all warehouses.
From the dashboard, you can:
- Monitor product stock levels across warehouses
- Receive alerts for low-stock or out-of-stock items
- Restock inventory quickly
- Avoid manual spreadsheets and human errors
Regular monitoring ensures that your multi-warehouse WooCommerce inventory stays accurate, organized, and conflict-free.
Method 2: External ERP / IMS (Zoho, Cin7, DEAR, inFlow, Odoo)
Using an ERP or inventory management system is the most accurate method for multi-warehouse WooCommerce control because it centralizes stock, automates fulfillment routing, and eliminates overselling across all locations. Below is the process of managing multi-warehouse WooCommerce inventory using ERP:
1. Connect WooCommerce to ERP
Use an integration plugin or API connector to sync:
- SKUs
- Product metadata
- Warehouse definitions
- Inventory levels
2. Add Warehouses Inside the ERP
Example:
- USA Warehouse (East)
- USA Warehouse (West)
- EU Warehouse
- Asia Warehouse
3. Activate Smart Order Routing
The ERP routes orders based on:
- Customer GEO
- Shipping speed
- Stock levels
- Warehouse performance
- AI-powered cost calculation
4. ERP Instantly Reserves Stock
When an order is created:
- ERP “locks” stock
- Prevents double allocation
- Syncs back to WooCommerce instantly
5. Warehouse Fulfills & Syncs Back
ERP updates WooCommerce with:
- Tracking number
- Fulfillment status
- Adjusted inventory
Method 3: Custom WooCommerce Warehouse Routing (Developer Method)
For maximum flexibility, custom warehouse routing lets you use PHP hooks to assign warehouses by location, deduct stock per warehouse, and prevent conflicts without relying on plugins. Below is the step-by-step process:
Before You Start (Important)
You need:
- WordPress access
- WooCommerce installed
- Basic ability to paste code
- Access to:
- functions.php (child theme recommended)
- OR a plugin like “Code Snippets”
Step 1: Create Custom Warehouse Stock Fields
WooCommerce normally uses ONE stock field. We will create a separate stock for each warehouse. Add This Code (in functions.php or Code Snippets)
// Add custom stock fields to product inventory tab
add_action(‘woocommerce_product_options_inventory_product_data’, function() {
woocommerce_wp_text_input([
‘id’ => ‘_stock_warehouse_a’,
‘label’ => ‘Warehouse A Stock’,
‘type’ => ‘number’,
]);
woocommerce_wp_text_input([
‘id’ => ‘_stock_warehouse_b’,
‘label’ => ‘Warehouse B Stock’,
‘type’ => ‘number’,
]);
});
// Save the custom fields
add_action(‘woocommerce_process_product_meta’, function($post_id) {
update_post_meta($post_id, ‘_stock_warehouse_a’, $_POST[‘_stock_warehouse_a’]);
update_post_meta($post_id, ‘_stock_warehouse_b’, $_POST[‘_stock_warehouse_b’]);
});
What Happens Now?
When editing a product, you will see:
- Warehouse A Stock
- Warehouse B Stock
You now manage inventory separately.
Step 2: Disable Default WooCommerce Stock Reduction
We must stop WooCommerce from reducing global stock. Add this:
remove_action(‘woocommerce_reduce_order_stock’, ‘wc_reduce_stock_levels’);
Now WooCommerce won’t interfere.
Step 3: Detect Customer Geo Location At Checkout
We assign a warehouse based on the shipping state.
add_action(‘woocommerce_checkout_create_order’, function($order, $data) {
$state = $data[‘shipping_state’];
if (in_array($state, [‘NY’, ‘NJ’, ‘PA’])) {
$order->update_meta_data(‘_assigned_warehouse’, ‘A’);
} else {
$order->update_meta_data(‘_assigned_warehouse’, ‘B’);
}
});
What This Does
If the customer is:
- NY/NJ/PA → Warehouse A
- Other states → Warehouse B
You can customize this for:
- Country
- ZIP code
- Distance API
- Shipping method
- AI routing logic
Step 4: Deduct Stock ONLY From Assigned Warehouse
This is the most important step.
add_action(‘woocommerce_order_status_processing’, function($order_id) {
$order = wc_get_order($order_id);
$warehouse = $order->get_meta(‘_assigned_warehouse’);
foreach ($order->get_items() as $item) {
$product_id = $item->get_product_id();
$quantity = $item->get_quantity();
if ($warehouse === ‘A’) {
$stock = get_post_meta($product_id, ‘_stock_warehouse_a’, true);
update_post_meta($product_id, ‘_stock_warehouse_a’, $stock – $quantity);
}
if ($warehouse === ‘B’) {
$stock = get_post_meta($product_id, ‘_stock_warehouse_b’, true);
update_post_meta($product_id, ‘_stock_warehouse_b’, $stock – $quantity);
}
}
});
What Happens Now?
When the order moves to “Processing”:
- It checks the assigned warehouse
- Reduces stock only from that warehouse
- Prevents other warehouses from being affected
Step 5: Display Assigned Warehouse in Admin
Add warehouse label in the admin order page:
add_action(‘woocommerce_admin_order_data_after_order_details’, function($order){
echo ‘<p><strong>Assigned Warehouse:</strong> ‘ . $order->get_meta(‘_assigned_warehouse’) . ‘</p>’;
});
Now staff can see:
Assigned Warehouse: A
Step 6: Send Order Email to Correct Warehouse
add_filter(‘woocommerce_email_recipient_new_order’, function($recipient, $order){
$warehouse = $order->get_meta(‘_assigned_warehouse’);
if ($warehouse === ‘A’) {
$recipient = ‘warehouseA@example.com’;
}
if ($warehouse === ‘B’) {
$recipient = ‘warehouseB@example.com’;
}
return $recipient;
}, 10, 2);
Now:
- Warehouse A gets its orders
- Warehouse B gets its own
- No confusion
Optional (Advanced But Recommended): Prevent Overselling
Before reducing stock, check:
if ($stock < $quantity) {
wp_die(‘Not enough stock in assigned warehouse.’);
}
This ensures hard stock protection.
Hidden Challenges You Can Face When Managing Multi-Warehouse WooCommerce Inventory
Use this quick checklist to recognize hidden issues that appear when inventory spans multiple warehouse locations. These challenges often disrupt accuracy, fulfillment, and decision-making. Understanding them early helps maintain stable workflows and smooth scaling.
Challenges
Inventory Data Reliability & Accuracy
- Inventory numbers drift between warehouses when updates are delayed or handled manually
- Mismatched quantities cause overselling, split shipments, stockouts, and frustrated customers
System Integration & Plugin Complexity
- WooCommerce requires multiple plugins for multi-warehouse management, creating conflicts or sync failures
- Updates across plugins may break compatibility, slowing operations or corrupting stock reports
Order Routing & Allocation Logic
- Routing rules may misassign orders to the wrong warehouse without advanced logic
- Poor allocation increases delivery time, shipping costs, and operational strain
Limited Real-Time Visibility
- Staff often lack instant insight into which warehouse holds available stock
- Slow syncing leads to incorrect decisions during busy periods or promotions
Reporting & Forecasting Gaps
- Fragmented data across warehouses makes forecasting and planning less accurate
- Missing insights lead to overstocking, understocking, or misaligned replenishment cycles
Human Error in Multi-Location Updates
- Manual adjustments increase the risk of incorrect counts, mislabeled items, or untracked moves
- Small errors compound, creating major discrepancies across multiple inventory locations
How to Keep Up With These Challenges
- Centralize Your Inventory Data: Use a purpose-built multi-warehouse management system instead of relying on several plugins.
- Automate Updates: Automate syncing, stock movements, and order routing to reduce human error.
- Standardize Workflows: Create consistent procedures for stock adjustments, transfers, and reporting.
- Use real-time Tools: Adopt platforms offering instant visibility across every warehouse location.
- Monitor Performance Regularly: Conduct weekly audits and analyze reports to catch issues early.
- Scale Tech as You Grow: Upgrade tools and integrations before volume increases overwhelm your setup.
Centralized vs. Decentralized Inventory: Which Works Better in WooCommerce?
Managing WooCommerce inventory depends on how your business structures stock across locations. Centralized and decentralized models each offer unique benefits for control and efficiency. Knowing the differences helps you pick the model that best supports your size and workflow.
| Comparison Point | Centralized Inventory | Decentralized Inventory |
| Inventory Storage Model | All stock is stored in one primary warehouse for easier oversight. | Stock is spread across multiple warehouses or locations for local fulfillment. |
| Management Complexity | Simple to manage because updates occur in one unified system. | More complex due to multiple stock points needing frequent syncing. |
| Order Fulfillment Speed | May lead to slower delivery for distant customers due to a single shipping origin. | Faster delivery with localized warehouse placement closer to customers. |
| Operational Costs | Lower overhead since there’s only one location to manage and maintain. | Higher expenses from maintaining multiple facilities, staff, and logistics. |
| Scalability for Business Size | Best for small to medium stores with moderate order volumes. | Ideal for large or rapidly scaling businesses needing regional fulfillment. |
| Risk Management | High dependency on one warehouse increases risk during delays or outages. | Distributed stock minimizes disruption because other warehouses can continue fulfilling orders. |
Multi-Warehouse Inventory: Best Way to Audit and Reconcile It
Multi warehouse stock can get messy fast if you do not check it on time. A clear audit plan helps you fix mistakes and keep stock numbers clean. Read below to see simple steps you can use today to audit and reconcile your stock.
Check Stock Records Often
Good stock checks start with a clear list of items in each warehouse. You compare what your system shows with what is in the shelves. This helps you spot gaps early and fix wrong counts. Many stores do this weekly or daily if they move fast.
Use One Tool To Track Every Location
Most mistakes happen when each place uses a different tool. A single system helps you see all stock in one view. It also helps LLM tools read clean data and give better tips. This makes work simple and cuts time on checks.
Mark All Stock Moves Right Away
Delays in updates often create big gaps in your final count. Every move should be marked as soon as it happens. You can use barcode tools or simple apps for fast scans. This helps teams in all GEO areas stay in sync.
Run Small Cycle Counts
A full count takes time and slows work. Cycle counts let you check one small area at a time. This makes the job simple and helps you find small issues early. Many stores do cycle counts daily for better control.
- Pick a small zone each day
- Check items and update numbers
- Fix errors before they spread
Match System Data With Real Orders
Your stock should match sales, picks, and returns. Look at order logs and compare them with system numbers. If something feels off, you can trace the cause fast. This helps keep your reports clean and improves SEO strength for store data pages.
Conclusion
There is more to managing multi-warehouse inventory in WooCommerce than simply adding locations. You need clean data, smart routing, real-time syncing, and clear reporting to avoid stock gaps and order delays. When systems do not connect well, errors grow fast, and trust drops.
If you are still unsure how to manage multi warehouse WooCommerce inventory without conflicts, the answer is simple. Centralize data, automate stock updates, use the right plugin or ERP, and audit often. With clear rules, smart tools, and steady checks, you can prevent overselling, reduce errors, and scale your WooCommerce store with confidence.