
Window frames play a crucial role in maintaining the structural integrity, energy efficiency, and overall aesthetics of your home. Over time, exposure to weather elements can cause various forms of damage to window frames, leading to issues such as drafts, leaks, and even compromised structural stability. Regular maintenance and timely repairs are essential to prolong the life of your window frames and ensure they function effectively.
Properly maintained window frames can also enhance the curb appeal of your home, adding to its market value. Neglected frames, on the other hand, can detract from the overall appearance and lead to higher energy bills due to poor insulation. Understanding the importance of window frame maintenance helps homeowners take proactive steps in preserving this vital component of their homes.
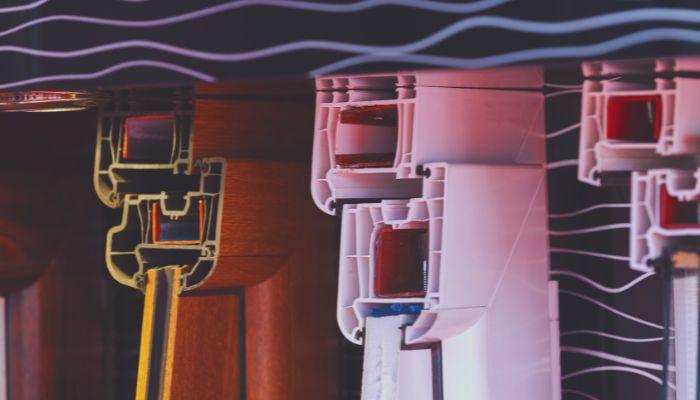
Common Types of Window Frame Damage
Window frames, whether made of wood, vinyl, or aluminum, are susceptible to different types of damage. Identifying these issues early can prevent more extensive and costly repairs. Here are some common types of front window glass and frame damage:
- Rot:
- Wood window frames are particularly vulnerable to rot, especially in humid or wet climates. Rot occurs when moisture penetrates the wood, leading to decay and weakening of the frame. This not only affects the structural integrity but also allows drafts and pests to enter your home.
- Warping:
- Both wooden and vinyl window frames can warp due to temperature fluctuations and moisture exposure. Warping causes the frame to bend or twist out of shape, making it difficult to open or close the windows properly and compromising the seal.
- Cracks:
- Cracks can develop in vinyl and aluminum frames due to impact damage, temperature changes, or prolonged exposure to the elements. Cracks can lead to air and water leaks, reducing the energy efficiency of your home and potentially causing further damage.
- Peeling Paint:
- Peeling paint is a common issue with wooden frames and can indicate underlying problems such as moisture penetration. Not only does it affect the appearance of the frame, but it also exposes the wood to further damage and rot.
By regularly inspecting your window frames for these common issues, you can address fix them promptly and avoid more significant problems down the line.

Tools and Materials Needed for Window Frame Repair
Effective window frame repair requires the right tools and materials. Having these essential components on hand will ensure you are prepared to tackle a variety of issues. Here’s a list of essential tools and materials needed for repairing window frames:
- Tools:
- Hammer and Nails: For securing loose or replacement parts of the frame.
- Screwdrivers: Necessary for removing and reattaching screws.
- Pry Bar: Useful for removing damaged or rotten wood.
- Putty Knife: For applying filler and smoothing surfaces.
- Sandpaper (Various Grits): For smoothing and preparing surfaces for painting or sealing.
- Utility Knife: For cutting away damaged material and caulk.
- Paintbrushes: For applying primer, paint, and sealant.
- Caulking Gun: For applying caulk to seal gaps and cracks.
- Materials:
- Wood Filler or Epoxy: For filling gaps, cracks, and holes in wooden frames.
- Replacement Wood or Vinyl Pieces: For replacing sections of the frame that are beyond repair.
- Primer and Paint: Essential for protecting and finishing wooden frames.
- Weather Stripping: For improving insulation and sealing around the window frame.
- Caulk (Silicone or Latex): For sealing gaps and cracks in all types of frames.
- Sealant: For protecting the frame from moisture and environmental damage.
- Screws and Nails: For securing new or repaired sections of the frame.
- Cleaning Solution and Rags: For cleaning the frame before and after repairs.
Having these tools and materials ready will make the repair process more efficient and ensure high-quality results.
Step-by-Step Guide to Repairing Wooden Window Frames
Repairing wooden window frames requires attention to detail and the right techniques. Follow these steps to restore your wooden frames effectively:
- Assess the Damage:
- Begin by thoroughly inspecting the frame to determine the extent of the damage. Look for signs of rot, cracks, and peeling paint. Use a screwdriver or a similar tool to probe the wood and identify soft or weakened areas.
- Remove Damaged Areas:
- Use a pry bar and utility knife to carefully remove any rotten or damaged wood. Be sure to clear out all compromised material to prevent further decay. This step may involve removing sections of the frame entirely if the damage is extensive.
- Fill Gaps and Holes:
- Apply wood filler or epoxy to fill in gaps, cracks, and holes. Use a putty knife to smooth the filler and ensure it is level with the surrounding wood. Allow the filler to dry completely according to the manufacturer’s instructions.
- Sand the Surface:
- Once the filler is dry, sand the repaired area to create a smooth and even surface. Start with coarse-grit sandpaper to remove any rough edges and finish with fine-grit sandpaper for a polished look. Be sure to sand the entire frame lightly to prepare it for priming and painting.
- Prime and Paint:
- Apply a coat of primer to the repaired area to seal the wood and provide a base for the paint. Use a paintbrush to ensure even coverage. Once the primer is dry, apply a coat of paint that matches the existing frame color. For best results, apply two coats of paint, allowing each to dry thoroughly before applying the next.
- Seal and Weatherproof:
- Apply a high-quality sealant around the repaired area to prevent moisture penetration. Consider adding weather stripping to improve insulation and energy efficiency. This step is particularly important for preventing future damage and maintaining the longevity of your wooden window frames.
By following these steps, you can effectively repair, replace and restore the integrity of your wooden window frames, ensuring they remain functional and visually appealing for years to come.
Repairing Vinyl and Aluminum Window Frames
Vinyl and aluminum window frames are popular due to their durability and low maintenance requirements. However, they can still suffer from issues like cracks, warping, and wear and tear over time. Here’s a step-by-step guide to repairing these frames, ensuring they remain in good condition and maintain their energy efficiency.
Repairing Cracks and Minor Damage
Cracks are a common issue in vinyl and aluminum window frames, often caused by impact damage or harsh weather conditions. To address this, you’ll need the following tools and materials: a utility knife, sandpaper, a putty knife, vinyl or aluminum window repair, kit, and touch-up paint.
- Clean the Damaged Area:
- Start by cleaning the cracked area to remove any dirt, dust, and debris. This will ensure that the repair materials adhere properly to the frame.
- Prepare the Surface:
- Use a utility knife to cut away any loose or damaged material around the crack. Sand the edges of the crack to create a smooth surface for the filler.
- Apply the Repair Kit:
- Follow the manufacturer’s instructions for the vinyl or aluminum repair kit. Apply the filler using a putty knife, ensuring it fills the crack completely. Smooth the surface and allow it to dry.
- Sand and Paint:
- Once the filler is dry, sand the repaired area to create a smooth finish. Apply touch-up paint to match the rest of the frame, enhancing its visual appeal.
Re-Sealing Vinyl and Aluminum Window Frames
Re-sealing is essential for maintaining the structural integrity and energy efficiency of vinyl and aluminum window frames. This process involves applying caulk to the glass to seal any gaps and prevent air and water leaks.
- Remove Old Caulk:
- Use a utility knife or a caulking tool to remove old, deteriorated caulk from around the window frame.
- Clean the Surface:
- Clean the area thoroughly to remove any dust and debris. This ensures the new caulk adheres properly.
- Apply New Caulk:
- Apply a bead of silicone or latex caulk along the edges of the frame where it meets the wall. Smooth the caulk with your finger or a caulking tool for a neat finish.
- Allow to Cure:
- Follow the manufacturer’s instructions for curing time. This ensures the seal is effective and long-lasting.
Preventive Measures to Extend Window Frame Lifespan
Preventive maintenance is key to extending the lifespan of your window frames and avoiding frequent repairs. Here are some tips to keep your frames in good condition:
Regular Cleaning and Inspection
- Clean Regularly:
- Clean your window frames regularly using a mild cleaning solution and a soft cloth. Avoid harsh chemicals that can damage the frame material.
- Inspect for Damage:
- Periodically inspect your frames for signs of wear, such as cracks, peeling paint, or rot. Early detection allows for timely repairs, preventing more significant issues.
Protecting Against Moisture
- Ensure Proper Drainage:
- Make sure your gutters and downspouts direct water away from your window frames. This helps prevent water damage and rot, especially in wooden window frames.
- Use Weather Stripping:
- Install weather stripping to seal gaps and improve insulation. This prevents drafts and moisture from entering your home, enhancing energy efficiency.
Repainting and Re-Sealing
- Repaint Wooden Frames:
- Repaint wooden window frames every few years to protect the wood from moisture and UV damage. Use high-quality primer and paint for the best results.
- Re-Seal Regularly:
- Reapply caulk around your window frames to maintain a tight seal. This is particularly important for vinyl and aluminum frames, which rely on a good seal for energy efficiency.
When to Call a Professional
While DIY repairs can address many issues, some situations require professional expertise to ensure a high-quality, long-lasting solution. Here’s when to consider calling a professional:
Extensive Rot or Structural Damage
- Extensive Rot:
- If you find large areas of rot in wooden window frames, a complete replacement of the affected sections may be necessary. A professional can assess the extent of the damage and recommend the best course of action.
- Structural Damage:
- Severe warping or damage to the frame can compromise the structural integrity of the entire window. Professional services can ensure the frame is properly repaired or replaced, maintaining the safety and functionality of your windows.
Complex Repairs and Upgrades
- Complex Repairs:
- For intricate repairs involving multiple materials or specialized techniques, a professional’s skills and tools are essential to achieve a high-quality finish.
- Energy Efficiency Upgrades:
- Professionals can recommend and install energy-efficient solutions such as insulated frames and double-glazed windows, improving your home’s overall energy performance.
Ensuring Compliance with Building Codes
- Building Code Compliance:
- Certain repairs and upgrades may need to comply with local building codes. A professional can ensure all work meets the necessary standards and regulations, avoiding potential legal issues.
Long-Term Solutions
- Long-Term Solutions:
- Professionals can provide long-term solutions that address the root causes of window frame issues, ensuring durability and preventing future problems.
By recognizing when professional help is necessary, you can ensure that your window frames are repaired correctly and maintain their functionality and aesthetic appeal for years to come.